Microfluidic systems are becoming increasingly popular both in research and in industry. They are excellently suitable for performing analysis and reactions with only small volumes of liquid. For example, one drop of blood is enough to detect the presence of certain diseases. Microfluidic chips can also be extended to include optical components, sensors, gas chromatographs, MEMS structures – in other words, ‘Lab on a chip’.
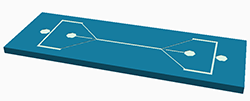
Microfluidics is a good example of miniaturisation, in which contamination becomes an increasingly bigger problem. Small particles may cause clogging of a channel or capillary, or cause short-circuiting or affect a measurement outcome.
The importance of cleaning is therefore apparent. Ultrasonic cleaning is an excellent technique for cleaning such small and delicate structures, but only when the ultrasound parameters are correctly chosen.
TYPICAL CLEANING PROTOCOL
A typical procedure for ultrasonic cleaning of microfluidic chips consists of the steps outlined below1. Both chip and fluid are usually placed inside a glass or plastic beaker that is then placed inside an ultrasonic bath.
N.B. This is only an example and not necessarily the best cleaning protocol for your chip.
- mild detergent solution, 5 minutes (for removing small particles)
- methanol, 5 minutes
- acetone, 5 minutes (for removing organic residues)
- demineralised water, 5 minutes
After cleaning the chip needs to be dried (e.g. using an oven or nitrogen gun), before the chips can be used or packaged.
1Microfluidic Techniques: Reviews and Protocols, S.D. Minteer, Springer, 2006
To improve this process, use our BuBble bags. 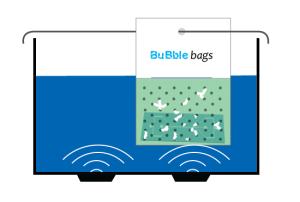
These bags have the same function as other containers, but improve the cleaning efficiency because more cavitation is being generated and damping of the ultrasound is minimal compared to e.g. a glass beaker. As an additional advantage, you don’t have to clean your beakers any more since the bag can be disposed off, and this minimises the chances on cross-contamination. Also, only 50 mL of each liquid is required, versus often 200 mL or more in a beaker glass.
5 TIPS FOR CLEANING MICROFLUIDIC CHIPS
- Use an ultrasonic bath with high frequency.
Higher frequencies leed to more gentle cleaning, with less chances on damage to delicate structures. - Use a solvent (ethanol, IPA, etc.) as cleaning liquid.
This facilitates easy drying after cleaning and doesn’t leave any residues. Check first if your chip materials are compatible with these chemicals. - Don’t put the solvents directly inside the ultrasonic bath. This leads to explosion risks.
- Rather use a BuBble bag.
Better cleaning, less chance on cross-contamination from previous cleaning jobs, reduced consumption of chemicals. - The cleaning is optimal in a ‘hot spot’ of the ultrasonic bath, usually above one of the transducers. The hot spots can be found by using cleaning indicators.


